Are you getting a 61-1 fault code and not sure what it means? This article will discuss the possible causes, symptoms, and what you can do to fix the issue. There are multiple car owners who experience this fault code and are not sure how to address it. So what exactly does this fault code indicate?
Here’s What 61-1: Battery Voltage Malfunction Means
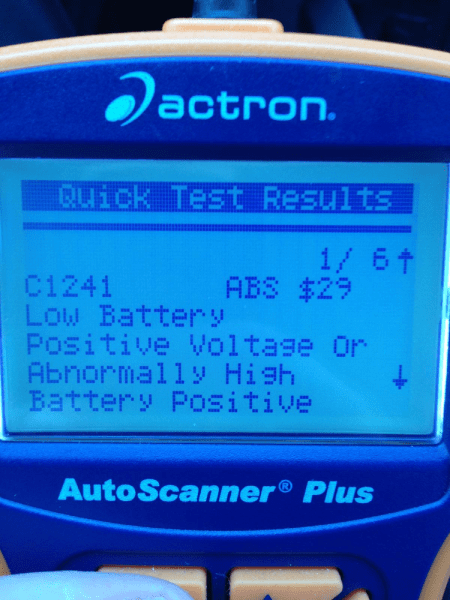
The 61-1 code is a diagnostic trouble code that may appear on your Honda’s dashboard screen. It is typically associated with issues related to the ABS system, such as a malfunctioning wheel speed sensor or a damaged wiring harness. The code may also be triggered by other factors, such as a weak or dying battery.
The 2009 Honda Pilot Technician Service Bulletin (TSB) defines the ABS error code as VSA Modulator-control Unit Initial IG Low Voltage. Other similar codes include DTC 61-2, 61-22, and 61-23: defined as VSA Modulator-control Unit Power Source Low Voltage 1, voltage 2, and voltage 3, respectively.

Before we move on, let me expand on the meaning of VSA. VSA means Vehicle Stability Assist by Honda. The software improves the driver’s experience during braking, acceleration, and drifting. It functions by relying on information provided by sensors found around the car.
To properly diagnose the 61-1 code, turn the ignition switch on and clear the DTC code with the Honda Diagnostic System (An OBDII tool). This is to clear any stored code. If there is no code, it could be a loose terminal issue.
If the code is still present, you should check and analyze the battery voltage using a voltmeter. Most times, the code is caused by a bad battery or alternator.
Check for any updates to the VSA modulator-control unit, as it could resolve the code.
Common symptoms of 61-1 Code
The 61-1 code is just your vehicle’s way of letting you know that its battery’s voltage is low or has malfunctioned. The common symptoms you will notice affects many electronic components in your vehicle. These symptoms include:
The car has a tough time starting
If you are having a tough time starting your car, this could be a symptom of the 61-1 code.
Since the battery supplies low voltage, typically below 10.8 volts, the car will struggle to crank and need to be jump-started frequently.
A battery needs at least 10.8 to 11.8V to start your car, and any voltage below will fall short.
Interior lights don t function properly.
Another symptom of the 61-1 code is dim interior lighting. A bad battery or bad alternator may cause your vehicle’s interior lighting to be dim. The alternator relies on the battery, while other electrical components of your car rely on the alternator to function properly.
The battery should be between 13.5-14.5V after starting the engine for the interior lighting to work properly.
AC is not working properly.
If you notice that your AC is not working properly, this could be caused by a poor supply of voltage to the air compressor.
The air conditioning system relies on the drive belt, air compressor, and electrical power, including the car battery and alternator. Failure of the battery and alternate to supply the required voltage will not kick the car AC compressor.
Common 61-1 Code Causes
The common causes of the 61-1 code can be traced to major components supplying electricity to your vehicles. They include:
There are several typical culprits that can trigger the dreaded 61-1 code to appear. By understanding the origins of the code, you can get ahead of the problem and restore normal functioning. Here are the most common causes:
Low Battery Voltage
One of the primary reasons for the 61-1 code is a weak battery unable to provide the proper voltage to components during cranking or starting of the vehicle. As soon as load is applied, the low state of charge causes voltage to drop significantly. This sudden dip is registered by onboard computers as a fault, activating the code.
Causes of insufficient voltage from the battery include:
- Old battery reaching end of service life
- Failed or dying battery cells
- Battery not properly charged
- Damaged alternator unable to charge the battery
- Excessive drain on battery from electrical accessories
Checking the battery and charging system will reveal if low voltage is the culprit. Switching out the battery or rectifying issues with the alternator will typically address the root problem.
Dead Battery
An even more severe voltage problem arises when dealing with a completely dead battery. If the battery has no charge and the starter motor cranks over with no power, the various ECUs detect the zero voltage situation. The battery is essentially providing no electricity to allow systems to switch on and operate. This manifests as a 61-1 code.
Jumping the dead battery or replacing it with a new fully charged battery will resolve the no-voltage issue. The code can then be cleared. Preventative battery maintenance and replacing an aging battery before it dies completely can help avoid this problem.
Battery Voltage High Malfunction
On the opposite end of the spectrum, some instances of the 61-1 code may be triggered by surging overvoltage from the battery. If a fault causes the battery to exceed ~15.5 volts during operation, it will damage ECUs and electronics. The risk of such high voltage is fire hazard and catastrophic failure.
Defective voltage regulators, bad alternators, and even improper jump starting can overcharge batteries. Once the overvoltage problem is fixed, new batteries or replaced components may be required before resetting codes.
ECM Problem
Because the engine control module (ECM) monitors voltage, an ECM malfunction itself can also be the root cause of a 61-1 code triggering erroneously. ECMs may fail due to:
- Power surges frying the unit
- Connector or wiring damages
- Internal component failures
- Overheating from location near hot exhaust
- Short circuits blowing out the unit
If voltage checks out fine, the ECM should be inspected and replaced if faulty. This will restore proper voltage monitoring and prevent false codes.
Grounding Problem
Proper grounding is essential for maintaining stable voltage. If ground wires are damaged or connections are loose, it disrupts the ground path and can cause voltage fluctuations detected as faults.
Corroded, rusty, or loose battery grounding points can cause such issues. Inspecting and cleaning/tightening all ground points will help optimize grounding. Damaged wires need to be repaired or replaced. Proper grounding is key to preventing errant 61-1 codes.
Airbag Replacement
In some cars, the 61-1 code is not an engine or ECM related code, but rather an airbag system code set off by airbag replacement. It indicates the airbag ECU detects a voltage discrepancy in the circuit after a new airbag is put in.
This is often just a minor software calibration issue. A quick trip to the dealership to have the airbag ECU reset typically resolves the problem and turns off the code. No extensive electrical fixes are required.
ABS System Code
In certain vehicles, the 61-1 code that appears is not from the engine ECU but rather the anti-lock braking system (ABS) ECU. This means the code is indicating an ABS issue specifically linked to low battery voltage detected during ABS operation.
The battery, charging system, and ABS sensors should be checked. Any faults causing voltage drops need to be corrected. Resetting the ABS module and 61-1 code after repairs will get the ABS functioning properly again.
Solutions to Resolve 61-1 Code
When the 61-1 code appears, it is important to diagnose the underlying cause and then apply the appropriate solution. Here are detailed steps to resolve the 61-1 code for each possible cause:
Repair wiring between fuse and VSA Modulator control unit
Due to vehicle age, driving conditions, poor maintenance, and weather conditions, it is inevitable that some vehicle wiring will get damaged. This is one of the more tedious repairs that we, mechanics, hate working on.
The main reason is that it can take several hours to spot the problem, as some of the more modern vehicles have up to 5000 feet of wiring.
Substitute or update the VSA modulator control unit
Sometimes your only option will be to replace the VSA modulator unit. Unfortunately, this is not a cheap repair and should only be done as a lost resort. It is worth looking for a used part, as this will reduce your repair cost considerably.
Low Battery Voltage
- Recharge the battery using a battery charger to bring the voltage back up to an optimal level.
- If recharging does not work, the battery may need to be replaced with a new battery that can maintain proper voltage.
- Inspect the alternator belt and pulleys for wear and tightness. Replace worn belts and tighten/align as needed.
- Use a voltmeter to check alternator output voltage. If low, the alternator may need repair or replacement.
- Check battery cables and terminals for corrosion; clean and replace as required.
Dead Battery
- Jump start the vehicle using jumper cables connected to a healthy battery or use a battery booster pack.
- Once running, check voltage levels. The battery may need replacement if it is unable to hold a charge.
- With a new battery installed, clear all error codes including 61-1.
Battery Voltage High Malfunction
- Inspect voltage regulator operation and check for any faults. Repair or replace the regulator if defective.
- Check alternator diodes for short circuits that can lead to overvoltage. Replace bad diodes.
- Disconnect the battery while the engine is running to see if overvoltage condition persists. If it does, alternator may be at fault.
- Ensure battery connections are clean and secure if loose connections are suspected of causing spikes.
ECM Problem
- Check for any blown fuses leading to the ECM and replace any that are blown.
- Inspect wiring harness to ECM for damage. Repair or replace damaged wires.
- Reseat ECM connectors to ensure no loose connections.
- Reset ECM and clear codes. If 61-1 persists, ECM likely needs replacement.
Grounding Problem
- Inspect condition of ground wires, cables, straps, and connection points. Clean or replace as needed.
- Check that engine block to chassis ground strap is intact.
- Ensure battery negative cable has clean attachment to both terminal and ground point.
- Verify ground connections are tight and free of paint/grease/debris/corrosion.
Airbag Replacement
- Following airbag system replacement, take vehicle to dealership.
- They can reprogram and calibrate the airbag ECU to clear codes including 61-1.
ABS System Code
- Check ABS wheel speed sensors for damage or worn wiring. Replace sensors if necessary.
- Verify tightness of sensor electrical connections. Loose connections can cause voltage drops.
- Clear ABS codes and test operation. If 61-1 persists, ABS module may need replacement.
Is It Safe to Drive With a 61-1 Code?
When a 61-1 trouble code appears, it’s reasonable to be concerned about whether or not it’s still safe to drive the vehicle. There are a few important factors to consider when making this determination.
First, you’ll want to monitor the vehicle for any serious performance issues that indicate it may not be safe to operate. For example, if the engine is stalling repeatedly or running extremely erratically, it is likely not wise to drive the car. However, some minor hesitation or reduced power may be manageable temporarily.
Next, check to see if any critical safety systems like the steering, brakes or airbags seem to be affected. If you notice major problems with control, stopping ability, or airbag warning lights coming on, it is best to avoid driving the car altogether until those vital issues can be addressed.
You’ll also want to watch for any flashing warning lights on the dash that indicate an immediate need for service. These types of warnings usually mean that key components have become damaged or are malfunctioning. Driving in this condition can be very unsafe.
The suspected cause of the code may also impact the decision of whether to drive or not. For instance, a 61-1 code set off by low voltage from a failing battery is generally less risky than one caused by surging high voltage that can rapidly damage electronics.
If you determine it is necessary to drive the vehicle temporarily, try turning off any non-essential electric accessories to reduce load on the compromised voltage supply. Also, keep trips as short as possible and avoid high speeds or congested traffic until the root cause can be properly diagnosed by a professional.
Zohan writes repair manuals and technical documents for multiple automotive publications. He helps create visual guides and instructions for dealership techs and savvy car owners. Zohan collaborates with engineering teams to ensure the repair manuals accurately reflect the vehicle designs. His manuals are valued for their clear organizational structure, step-by-step visuals, and focus on safety.


