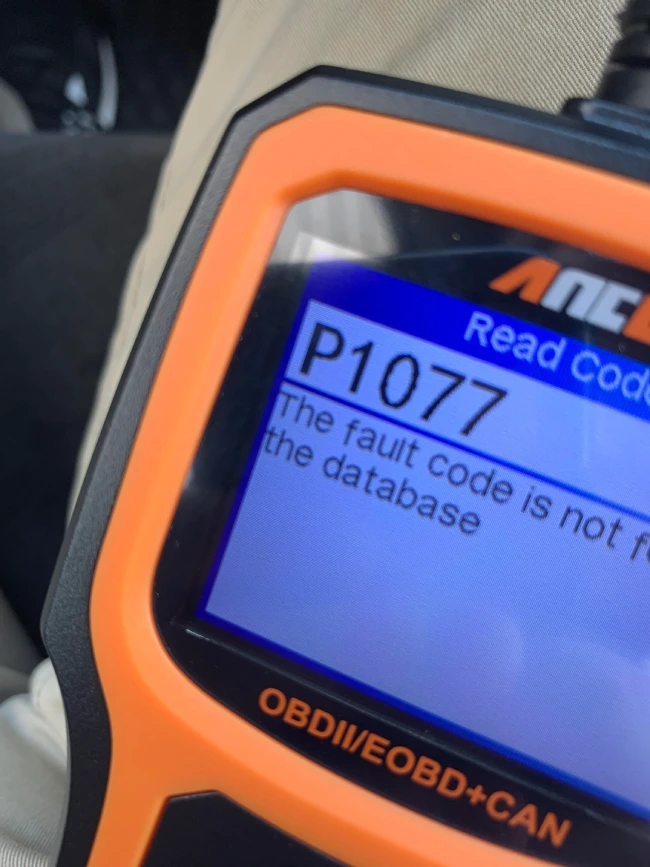
The P1077 code is one of two codes that indicates a problem with the intake manifold runner control (IMRC). The IMRC system controls the flow of air within the intake manifolds by opening and closing the valves to ensure maximum airflow at different engine speeds.
When the system malfunctions (at low rpm) the P1077 code shows up on the dashboard. Here are the potential causes of this problem.
Potential causes of the P1077 Honda CRV Code
1. Faulty Intake Manifold Runner Control (IMRC) valve
The IMRC valve opens and closes at the right time to let air into the combustion head. Sometimes, the valves get stuck and when this happens, the amount of air entering the engine is not regulated. If the valve is stuck in the open position, then it could be letting in more than the required amount of air and if it is stuck in the closed position, then air is completely cut off from the engine. Either way, this will cause problems in the engine and can result in the P1077 code.
2. IMRC valve actuator malfunction
The IMRC valves are controlled by solenoid actuators. The actuator is in turn controlled by the electronic control module (ECM). If the valves are functioning properly, then the problem may be due to a faulty IMRC valve actuator. A sudden spike in voltage can burn the solenoid coil causing it to malfunction.
3. Vacuum leaks in the intake manifold
Vacuum leaks occur when excess air enters the combustion head. Normally, the quantity of air is regulated so that the fuel-air mixture isn’t lean (that is more air than fuel), or rich (that is more fuel than air). But when there is a vacuum leak, air passes through fissures on the manifold or gaskets into the combustion chamber. This increases the volume of air more than what’s necessary. The lean mix can cause hard starts and other issues including the P1077 code.
4. Damaged or disconnected vacuum lines
There are several vacuum lines in a car and some of them are found within the IMRC system. These lines are mostly made of hard plastic or rubber and can develop cracks on the surface or become loose. Vacuum lines are prone to damage from extensive pressure and harsh operating conditions making them one of the most common sources of vacuum leaks.
5. Faulty wiring or connectors
Another component of the IMRC system that can potentially cause a P1077 code is the electrical wires and connectors. These are often insulated to prevent damage or short circuit. But the insulations can wear off either from abrasion or overheating and corrosion can develop at the connectors. Loose connectors and frayed wires can disrupt the flow of electricity and cause the system to malfunction. Even more dangerous is the fact that exposed wires can easily cause a short circuit in the system damaging sensitive components like the intake manifold runner control valve actuator.
6. Engine Control Module (ECM) issues
The engine control module oversees the operation of the IMRC system. The ECM activates the solenoid actuator to open and close at the right interval. If the ECM is faulty, then the timing of the IMRC valves will be off, letting in more or less air than what is needed.
Symptoms Associated with P1077 Code in Honda CRV
1. Poor engine performance at low RPMs
The first symptom of a P1077 code is going to come from the engine. The performance of a car’s engine depends so much on the fuel-air ratio. If this ratio is disrupted due to a faulty IMRC valve, actuator, ECM, or other potential causes I’ve already mentioned, then the engine will not run as smoothly as it should. A tale-tale sign that something is wrong with it. Some of the signs you may observe are long erratic idling, lack of power when throttling, poor fuel economy, the engine may misfire and crank for a while before starting up.
2. Check Engine light displayed on the dashboard
One of the fastest ways to tell that something is wrong with your car is when the check engine light comes up. The check engine light is a bright red or yellow (depending on the type of car) indicator that comes on whenever there is a problem with the engine of a car. Despite being a general indicator of the overall health of the car’s engine, the check engine light is very helpful because most times, it is the first thing you will notice before most of the other symptoms.
3. Decreased fuel efficiency
With rising fuel prices there’s no doubt that fuel efficiency is at the top of the list for anyone who owns a car or is looking to buy one. Most drivers can tell from experience how many miles they would get for a certain quantity of fuel. If you observe that your car runs out of fuel quicker than it used to (for the same distance), then one of many culprits is the P1077 code. Decreased fuel efficiency arising from the code is due to the malfunctioning IMRC system. But similar to the check engine light, there are other possible causes of low fuel efficiency and that is why you would need to confirm with a scan.
4. Unusual engine noises during acceleration
A pinging or rattling sound coming from the engine is another warning sign commonly associated with the P1077 code. This abnormal noise is a result of an incorrect fuel-air mixture. Sometimes it could be just a low rumbling sound at low rpm and other times it’s a loud bang from the exhaust. Both of these symptoms lean heavily toward the fuel-air mixture in the combustion chamber.
5. Stalling or rough idling
If it takes several attempts to get your car started or you feel the car rumble slightly when you decelerate or idle, that is another sign of a malfunctioning IMRC system. However, this symptom as with many others I have discussed here, is not unique to the P1077 code alone. This is why it is important to run a diagnosis to be certain if the problem is from the IMRC system or some other fault in the engine.
Diagnosing the P1077 Code
To avoid mistaking the symptoms of some other engine fault for the P1077 (due to the interrelated nature of these symptoms), it is important to run a diagnostic check on the main component of the IMRC system. These are the IMRC valve, IMRC actuator, intake manifold, vacuum lines, and electrical wiring. Before you proceed, here are the basic tools you will need and some precautions you should take.
Tools
For this diagnosis, you will need;
- A screwdriver
- A vacuum pump
- A Spray bottle filled with water
- A pair of gloves and
- A wrench
- An OBD II scanner
Precautions
- Be careful when using the spray bottle
- When disconnecting the batteries, start by removing the negative terminal before the positive terminal
- Wear hand gloves to avoid burns or electrical shock
- Avoid moving parts of the vehicle if the engine is turned on during any of the steps.
Step-by-step diagnostic procedure
Step 1 – Inspect the IMRC valve
The IMRC valve assembly is inside the intake manifold. So the first thing to do is to remove the intake manifold. To do that, first disconnect the vacuum lines, lose the bolts and remove the intake manifold. Once the valve assembly is out, you can visually inspect it. What you are looking for is cracks and dirt that build up over time. Then you apply the vacuum using the vacuum pump and see if the valves can hold a vacuum. If not, then you have to replace the assembly. But if it holds a vacuum, then clean the valve to remove dirt and put it back in its place.
Step 2 – Inspect the IMRC valve actuator
Next, inspect the IMRC valve actuator. The valve actuator is a solenoid that opens and closes when current passes through it and by doing that it controls the flow of air to the intake manifold. To test the IMRC valve actuator, you need to run both pressure and electric diagnostics. Here are the steps involved;
- Disconnect the IMRC valve actuator from the engine
- Connect it to a 12 volts battery
- If the valve responds by making a clicking sound, then electrically, it is in good shape
- Next, apply pressure to one end of the actuator using a hand pump
- Connect the valve to the battery terminals once again. First, connect the positive terminal of the IMRC valve to the positive terminal of the battery, and do the same for the negative terminal. If you hear the clicking sound and then air oozes out of the open end of the IMRC valve actuator. That means the valve is open and lets out air.
- Next, reverse the polarity of the battery, that is, connect the positive terminal of the valve to the negative terminal of the battery and the negative terminal of the valve to the positive terminal of the battery. There should be no air flowing out from the open end of the valve.
If this all works as described here. Then the IMRC valve actuator has no problem. But if not, then you should consider replacing It.
Step 3 – Check for vacuum leaks in the intake manifold
The third step is inspecting the intake manifold for damages. Cracks on the manifold should be fairly easy to spot if they are big enough. But smaller cracks may need a little bit of creativity. Most professionals would pressure test the manifold or use a smoking machine to detect fine cracks. But this is not readily available. A cheaper alternative will be spraying soapy water onto the manifold while the engine is idling. You should see a noticeable decrease in the engine speed if there are cracks on the manifold. Additionally, spurts of soap bubbles would be seen around the cracks. This will help you identify the source of the leakage.
Step 4 – Assess vacuum lines for damage or disconnection
Similar to the intake manifold, you have to look for signs of damage to the vacuum lines. If you can not easily spot the cracks, then use the spray bottle technique I described above. Any leak would make the engine speed slow down considerably. You also have to inspect the connections to make sure they are not loose.
Step 5 – Inspect wiring and connectors related to the IMRC system
Electrical wiring can be damaged and this will cause problems within the IMRC system. If the insulation has worn off, the wire will be exposed. The exposed wire can easily shortcircuit the system and damage sensitive components. Apart from exposed wires, loose wire connections are equally a problem. So make sure you test the wiring connections to make sure they are not loose.
Step 6 – Verify ECM functionality
The final step to take when diagnosing the cause of the P1077 code is to verify that the engine control module is functioning the way it should. The quickest way to determine this is by scanning the engine. A damaged ECM will likely give off an error code that will let you know what exactly is wrong with it. If nothing comes up on the scanning tool, then your ECM is fine.
How to Fix the P1077 Code
The six steps outlined above will help you diagnose the cause of the P1077 code which could be a result of one or multiple failed components within the IMRC system. If several components have failed, then you will have to fix each component one after the other until you get rid of the P1077 code. Here are common solutions to the P1077;
Replace faulty IMRC valve – a damaged IMRC valve will need to be replaced. But if the valve looks fine upon inspection, then the problem could simply be caused by the build-up of dirt. In that case, you can easily clean the valve and the manifold
Repair or replace the IMRC valve actuator – the actuator could be damaged mechanically or electrically. You can consider repairing the actuator valve as it is expensive to replace. But if it is beyond repair, then you have to replace it.
Address vacuum leaks in the intake manifold – if the intake manifold is damaged, then it can create a vacuum leak. Damaged intake manifolds can either be replaced or repaired. The option you go for would depend on the extent of the damage. If the damage is just a minor crack then you can seal the crack using epoxy or welding with a heating gun. If not, then consider replacing the intake manifold.
Replace or reconnect damaged or disconnected vacuum lines – another cause of vacuum leaks is the lines that hold the vacuum within the IMRC system. These are usually made of hard plastics and could become damaged with time. If you observe cracks on the vacuum lines during the inspection, then you have to replace them. Otherwise, check the connections to make sure there are secure.
Fix faulty wiring or connectors – this can easily be repaired with a cutting tool and tape. Peel off the insulation around the affected area of the wire, cut out the affected area, join the two ends of the wire, crimp it in place, and then apply tape around it. For loose connectors, all you have to do is tighten the connectors and secure them in place.
Address any ECM issues – if a code relating to the ECM popped up during the scan, then you need to sort it out. You would hardly need to replace the ECM except if it was fried by an electrical surge. In most cases, simply reprogramming the ECM does the trick.
FAQ
How serious is this code?
Some of the symptoms of the P1077 code are; poor acceleration, frequent misfires, noise and rattling sounds coming from the engine, and low rumbling when idling. All of these will deprive you of a smooth driving experience. Also, if the problem is left to fester, it might damage the engine and that means you will be spending more money on repairs.
Can I still drive the car?
Yes. It is possible to drive the car even with a P1077 code depending on how bad the situation is. A mild issue like fine lines on the vacuum lines or intake manifold may not need immediate intervention. However, a damaged IMRC valve, actuator, or ECM will need to be fixed as soon as possible.
How can I prevent Future P1077 Code Issues?
You can prevent or reduce the frequency of the P1077 code in the Honda CRV through regular engine maintenance, monitoring engine performance at low RPMs, staying vigilant for symptoms, and ensuring proper vacuum line wiring connections.
Additional Honda Codes:
- P0341 Honda: What Causes It, and How Do You Fix the Error Code?
- P1361 Code Honda: Meaning, Causes, and Solution
- P3400 Code on Honda Pilot (Explained & Solution)
- P1009 Honda- Meaning and Possible Causes
Resources:
Symptoms of a Bad or Failing Intake Manifold Runner Control
Engineering Coordinator with 5+ years of experience in the automotive manufacturing industry. Currently supporting vehicle development and new model launch activities at Honda Development and Manufacturing of America. Skilled at managing engineering teams, overseeing prototype builds, coordinating testing, and driving continuous process improvements. LinkedIn