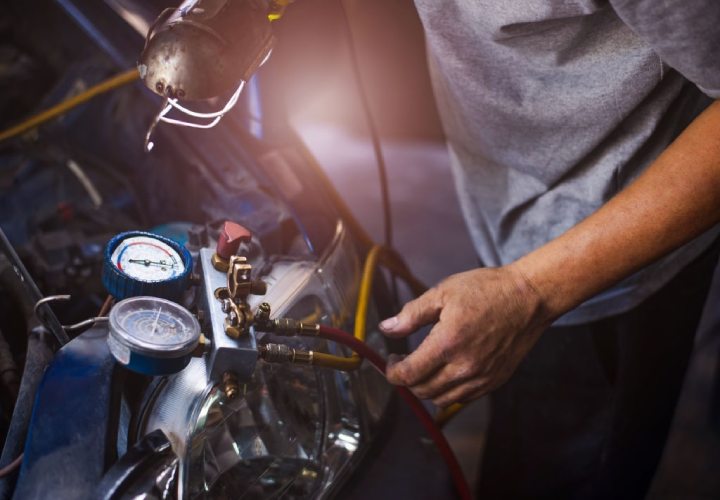
A car in good condition would not make any noise when you take a corner. However, if you hear clunking, popping, cracking, squealing, groaning, shrieking, or whining, something mechanically isn’t right. Although some of these issues can be quickly resolved, some issues necessitate a deeper diagnosis.
A clunking noise only when turning can be caused by multiple faulty parts. Pinpointing the root of your problem won’t be easy, but here are four main components you should check!
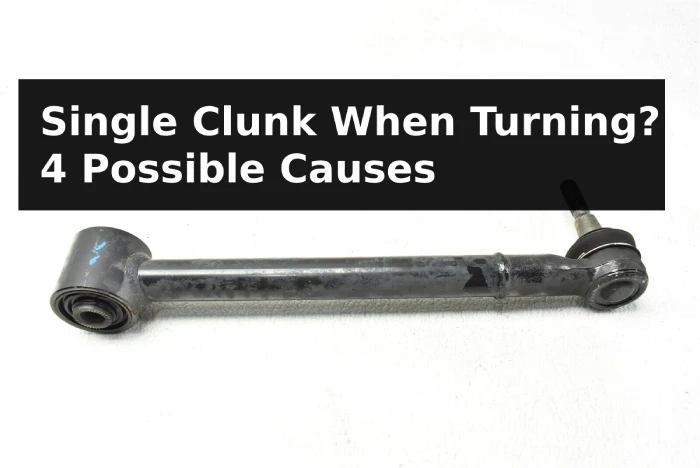
01. Lose Control Arm
The metal components known as control arms join the vehicle’s chassis to the steering knuckle, where the wheels and tires are attached. These are essential for the vehicle’s steering and suspension. A ball joint at the end of the control arms connects to the steering knuckle to transmit turning movements to the wheels.
Although a worn-out or damaged control arm bushing can significantly impact how your car handles, however, a control arm bushing’s main functions are maintaining control arm alignment and less vibration generated between the frame and the wheels.
Low vibration results in a relaxing journey with few annoying interruptions. The bushing gets knocked between the frame and the control arm when the control arm bushings are too loose or worn out, resulting in a clunking sound emanating from underneath your vehicle. Driving on rocky or uneven terrain will make this sound louder, but even little bumps or standard harsh braking might make this noise.
Related content: Why does my car make a clicking noise when braking?
Fixing a Loose Control Arm
To begin, you must take your car off its wheels and jack it up using jack stands. Before performing any work on your car, be sure to put on safety gloves and goggles, and ensure the vehicle won’t go anywhere.
Release the joint first. You will want a large wrench (between 20 and 24 mm) or a socket. Once the cotter pin has been removed, loosen the ball joint nut.
Next, strike the control arm with a hammer. Use a hydraulic jack to support the arm if you are working on a suspension, and then gradually lower it once the ball joint has been released. A sway bar link connects the control arm and the sway bar.
- First, remove the nut using a 14mm or 15mm socket or wrench. At this point, there can be a small taper fit that needs to be shocked loose with a ball joint.
- Next, take the sway bar link away from the mount while holding onto it. You are removing the sway bar link from the way by doing this.
- Third step: Remove the bolts. Two mounting bolts will secure the fixture for control arms, which may be vertical or horizontal. Use a 19mm–22mm socket or wrench to release and remove the bolts. The rear of a few bolts will have a nut that needs to be fastened.
- Remove the Arm. If the control arm is still attached to its mounts, grasp the part firmly and pull it outward. Then, to gradually remove it from the frame mounting, raise and lower it.
- Change the bushes. If you are merely replacing the bushings, proceed to the next step. Continue reading this instruction through step 6 if you intend to replace the entire control arm. Locate a replacement for the old bushings. Verify that the match is exact. Press to replace the old control arm bushings with the new ones and remove the old ones. To ensure that the replacement bushing is installed correctly, start by designating the orientation. If the bushing is fitted improperly, movement will cause it to tear.
- Reinstall The Lower Control Arm
Push the bushing into the lower control arm’s corresponding frame mounts while holding the refurbished or new lower control arm. You might need to move up and down to aid in the process. As you install the arm, please pay attention to the bolt holes to ensure they are properly positioned and inserted.
Completing this task without tools will be challenging, so use a screwball. To avoid cross-threading, press them into the slot by hand once the mounting bolts are in place. Before starting all of the bolts, avoid over-tightening any of them. Next, place the lower ball joint into the control arm and wedge it in. The nut must now be manually installed.
Cost of Repair
One bushing replacement typically costs around $350. As a result, replacing all four bushings on your car would cost roughly $1,200. You should normally budget between $200 and $500 for each bushing, depending on the make/model of your car and the location of the technician.
Related content: Why Does My Car Feel Like It’s Floating?
02. Faulty Spring Pad

The leaf spring pads on your classic may have outlived their usefulness if you’ve observed some rear-end steering. When the rear axle kicks and moves over bumps due to compression and wear on the brake pads, it is time to replace those worn-out brake pads.
Fixing a Faulty Spring Pad
It is advised to lift the car as high off the ground as possible and remove the rear wheels to make the task as simple as possible. Spray penetrating oil on the bolts holding down the lower shock absorber mounting plate (below) to aid in loosening. The removal of the nuts will require a lengthy socket because the pads may have been compressed over time and locked in place. You might also need to use a clamp or hammer to keep the leaf springs taut as you maneuver around the nuts.
Leverage the plate and the U bolt away from the spring to detach the sandwich plate and remove the old rubber pads. The axle will eventually sit on the exhaust, so take caution when doing this. The top end of the spring can then be pulled up to release the top pad.
Cost Faulty Spring Pad
Rubber pads can be used to replace these, but nowadays, polyurethane substitutes (above) are advised because they last longer and cost slightly more; two of these replacements are required for each side and cost $8 a piece.
03. Pivot Bearing
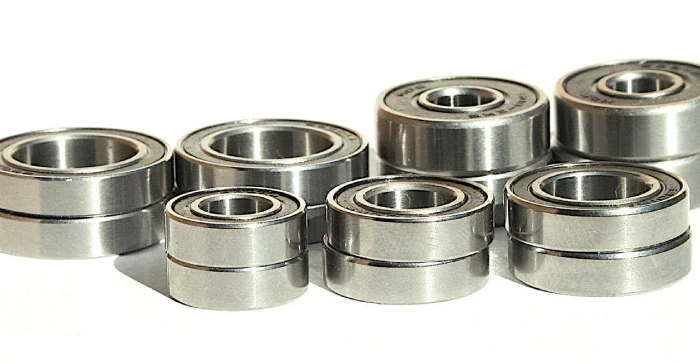
Pivot bearings are engineering bearings, frictionless and suitable for angular movement. The optimal time to replace a pivot bearing is once a year. This serves as vital preventative maintenance and ensures that your bike continues to perform as smoothly as the day you bought it. However, bearing replacements are frequently done on an as-needed basis, which is advantageous if you’re on a tight budget.
If you frequently ride through muddy circumstances, your bearings can even start to wear out before a full year has passed. When a pivot bearing begins to exhibit some play, just like any other bearing on your bike, it is time to replace it. Lift your bike’s rear end gently without letting the rear wheel lift off the ground to check for any play immediately.
How To Check For Defective Pivot Bearing
Remove the shock and rotate the rear end to check for worn bearings before the play develops. Any rigidity or grit-and-notch sensation indicates that a bearing needs to be changed. It’s time to get some bearings and get out the wrenches when something isn’t working properly.
By rolling each bearing between your fingertips to check for wear and play, you may quickly remove the frame to determine whether you only need to replace a few bearings. To avoid returning sooner than required, you should take care of the others if one is absent.
Related content: Car Making Creaking Noise When Driving Slowly! Here’s Why!
How To Fix a Defective Pivot Bearing
You must remove your crank to access pivots concealed beneath your bike’s chainring. Additionally, removing your bottom bracket may make it easier to reach the pivots. Clear the frame of those bearings. Using a slide hammer or bearing puller tool, force is used to accomplish this.
First, select the correct size extractor for the bearing if you’re using a slide hammer, and then tighten it up with a set of spanners. Next, put the remainder of your slide hammer together. When the puller is ready, you can coax the bearing out of the slide hammer by pulling back firmly on the slider. However, given that certain bearings are more difficult to remove than others, it is best to proceed with caution and take your time.
This is because factory assembly frequently produces inadequate lubricant use or grease that washes away while riding, eroding the bearing in situ. It’s time to press the new bearings into the clean races, but before you grab the press, prepare those races by lining them with premium oil. This will simplify insertion, but it should simplify removal the next time. After that, put your press together and lubricate the brand-new bearings.
To ensure that the non-bearing side of the press has a smooth surface to rest against and that the bearing slides in straight, it is recommended to press each bearing in one at a time. This is crucial since forcing a bearing in incorrectly could harm your frame.
Finally, your frame needs to be returned after being refilled with new bearings. This may be the most difficult portion of the process, so take your time or, better yet, ask a friend for help. Keeping the spacers and seals in place cannot be easy, and they must all be repositioned.
It’s a good idea to add a small amount of grease on the side that faces the bearing. The spacer will still move slightly as you slide one frame component over another, but it won’t fall out anymore. The finest methods for putting a frame back together involve going in reverse order and being careful to provide a finishing touch.
04. Loose Thrust Rod
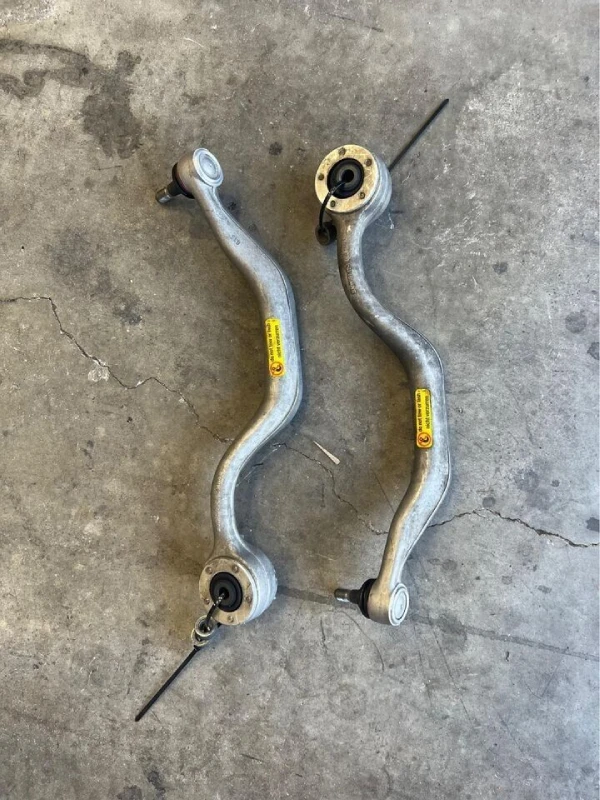
Thrust rods or thrust arms and bushings are in charge of regulating the suspension’s motion to ensure a smooth transfer of force and pressure from the wheels of your car to the frame. This happens whenever the suspension’s inertia changes direction, most notably during braking. For instance, when you stop moving after moving forward or backward.
For the trust arms, BMWs only use rubber bushings filled with fluid for example. Over time, when the rubber in these bushings deteriorates, fluid will seep out of them, and they will stop giving the thrust arms the sturdy support they require. When you start or stop, this may cause clunking sounds, vibrations, and a hesitant sensation in the chassis, due to tire wear and misalignment.
When a portion of the rubber in a thrust arm bushing splits and the internal fluid pours out, the bushing fails. It is possible to diagnose a failure by detecting a rubber tear or a fluid leak. By prying each bushing end away from the frame using an 18″ pry bar, you can check for a bushing rubber tear. Unfortunately, it is challenging to see the rubber ends clearly while the bushing is attached.
Disconnecting the bushing from the frame is another option. Unfortunately, the removal and remounting of the bushing are somewhat labor-intensive. This will make it easier to see and inspect the rubber bushing ends. In addition, the bushing bolt must be removed, which necessitates the removal of other components.
Cost of Repair
The price to repair a control arm bushing might vary greatly depending on the brand and model of your car. While labor typically costs between $100 and $300, the price of new bushings can range from $5 to $150. Accordingly, the total cost for a single bushing repair will range from $105 to $450. In addition, taxes and fees are frequently included, and you might also need to get your alignment done or repair other suspension components simultaneously.
Related content: Clunking Noises When Accelerating And Decelerating – Explained
Is It Safe To Drive With a Clunking Noise When Turning?
If you hear a clunking sound while driving, you might wonder if it’s still safe. It could not be safe if the noise was caused by a broken or malfunctioning shock absorber or a defective steering system. If you do, you risk of loosing control of your vehicle in some situations. Also, all automobiles are not created equally.
In a Chevy or Toyota, some clunking noises might not signify the same thing as they do in a Honda. When we’re talking about a 10-year-old car, there are a lot of potential problems. Compared to cars with a MacPherson strut suspension, double-wishbone automobiles will make a distinct noise. When you hear a clunking noise, take your vehicle to a mechanic for a check-up and repair.
Every since I was a little boy, I can remember spending the afternoons in my dad’s repair shop. I got my first car at 16 and it was the best feeling ever!
I have contributed to various automotive publications but decided it’s finally time to settle for something constant.